 Your Privacy Choices
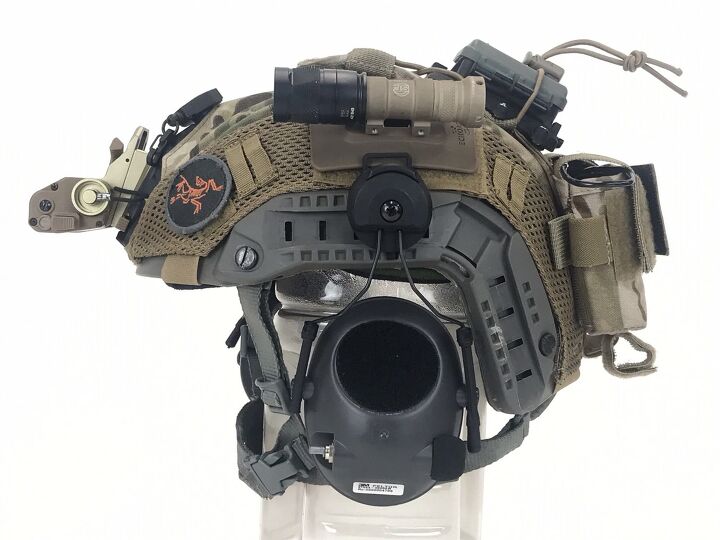
Just like firearms, there is a world of accessories for the night vision equipped shooter. In this week’s edition of Friday Night Lights, I will highlight some of the commonly used or interesting night vision helmet safety accessories that I have used or have seen other people use. Hopefully, you will discover something here that may help you with your night vision helmet build.
NVG Lanyards
Last month I extensively covered the most common night vision mounts so we will skip that this week. Let’s focus on the accouterments that can make night vision use more enjoyable and useful. Your standard night vision helmet like Team Wendy, Ops-Core, or MTEK will have bungees on the side of the helmet however those are not the same as a lanyard. The bungees are there to help minimize slop in your night vision mount. Mounts are considered a consumable item to some in the night vision industry. They can wear down and display a decent amount of play. Having your NODs jiggle around is not ideal so the bungees are attached to the mount or the goggles themselves and that helps pull them inward.
One of the most useful night vision helmet safety accessories to have would be some form of lanyard to help protect your night vision investment. Let’s be honest, night vision is not cheap. NODs can cost more than your gun but they are smaller and while some are robust it is not a good idea to let them drop and hit the ground. So get a lanyard that will act as bungee or leash in case your NODs take a flying leap off your helmet.
Wilcox Lanyard
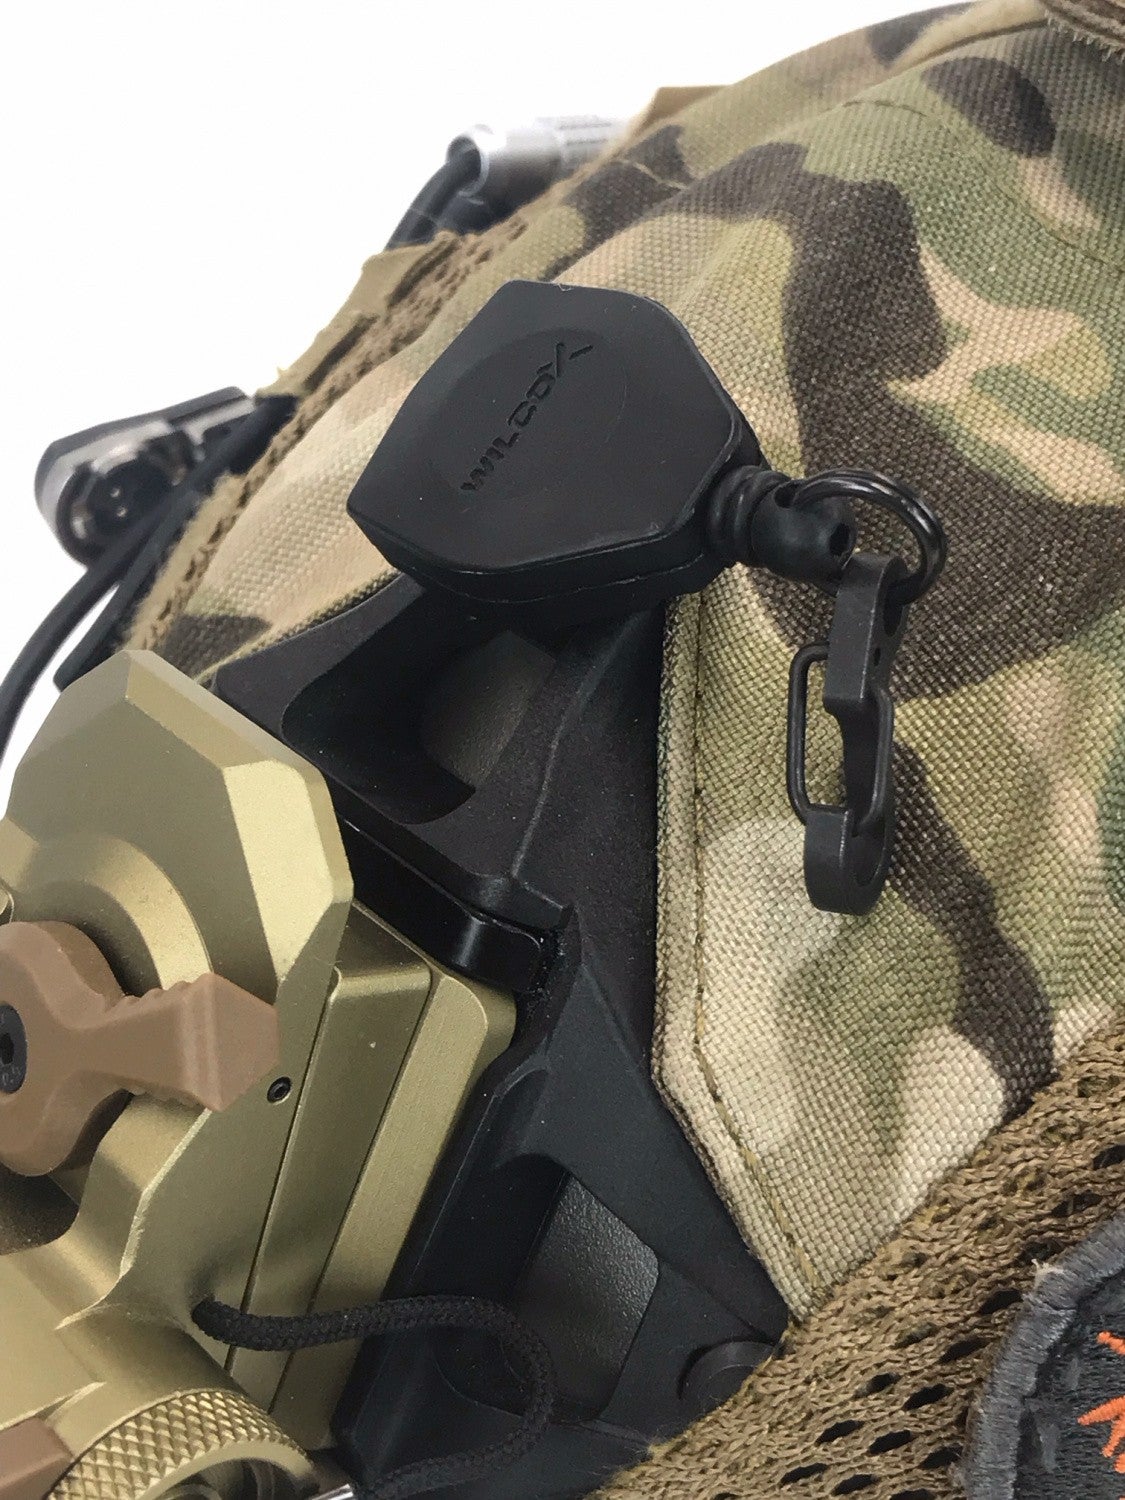
The Wilcox lanyard works in conjunction with their 3-hole shroud. There is a sort of QD socket that is bolted onto one of the three holes of the shroud and you pop the Wilcox lanyard into it. However, you do not have to use their shroud if you do not want to. I bolted a Wilcox Lanyard to the side rail of my helmet. Just unscrew the bolts of the rail and attach the Wilcox Lanyard to the forward most slot of the Arc Rail.

Wilcox also makes a version for the OPS CORE VAS Shroud.

Photo by TNVC
The Wilcox lanyard is a glorified ID card retractable lanyard. You could probably jury rig something similar if you do not feel like spending around $60 for a keychain lanyard. At least that is what TNVC is charging for a Wilcox lanyard. However, that is full retail price and unless you have money you need to burn, there are other solutions. Often you can get a Wilcox lanyard secondhand for less or you can find some bundle options if you buy a Wilcox 3-hole shroud with the lanyard.
Costa Defense Squid Retention System (SRS)
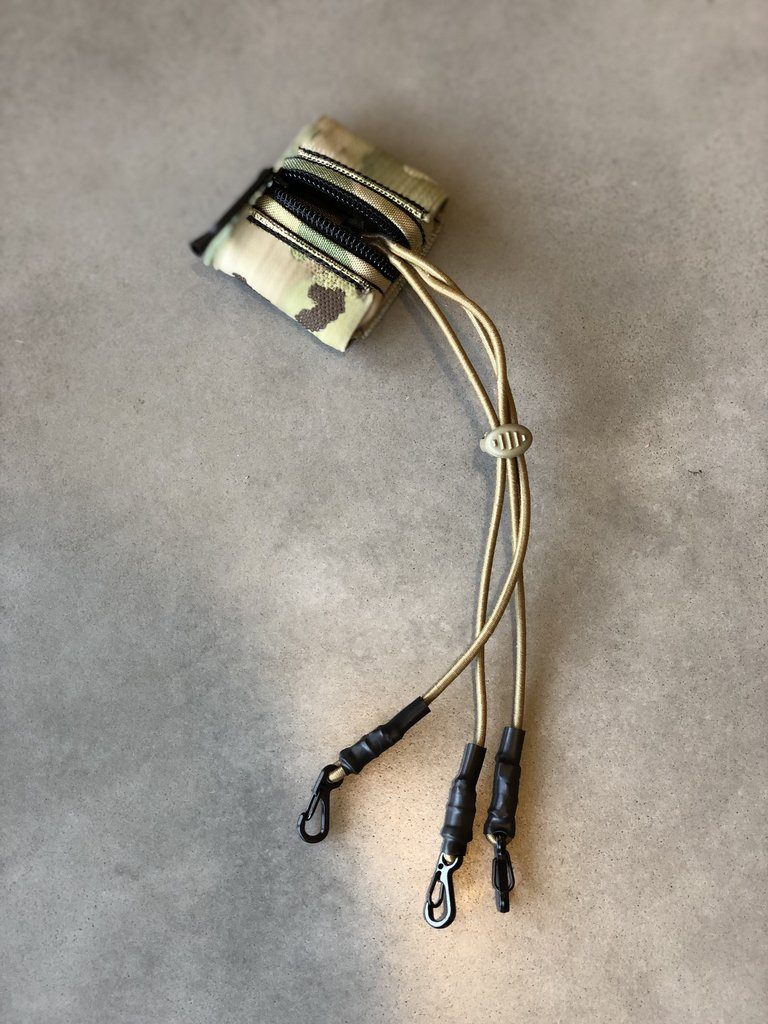
Photo by Costa Defense
An alternative solution is the SRS by Costa Defense. It is a small zippered pouch with three shock cords attached inside the pouch compartment with snap hooks on each end. As you can see in the photo above there is a friction slide lock that allows you to adjust the length of the bungee cord for different accessories. When not in use you just shove the SRS cords into the pouch and zip the SRS closed.

Photo by Costa Defense
On either side of the zipper are elastic battery holders. They fit AA & AAA. (Will also fit CR123, 18650 and 18350, but the fit is tight). The SRS is velcro backed to attach to your helmet.

Photo by Costa Defense
You can use the SRS to tether your NODs and even other helmet-worn accessories like a helmet light.
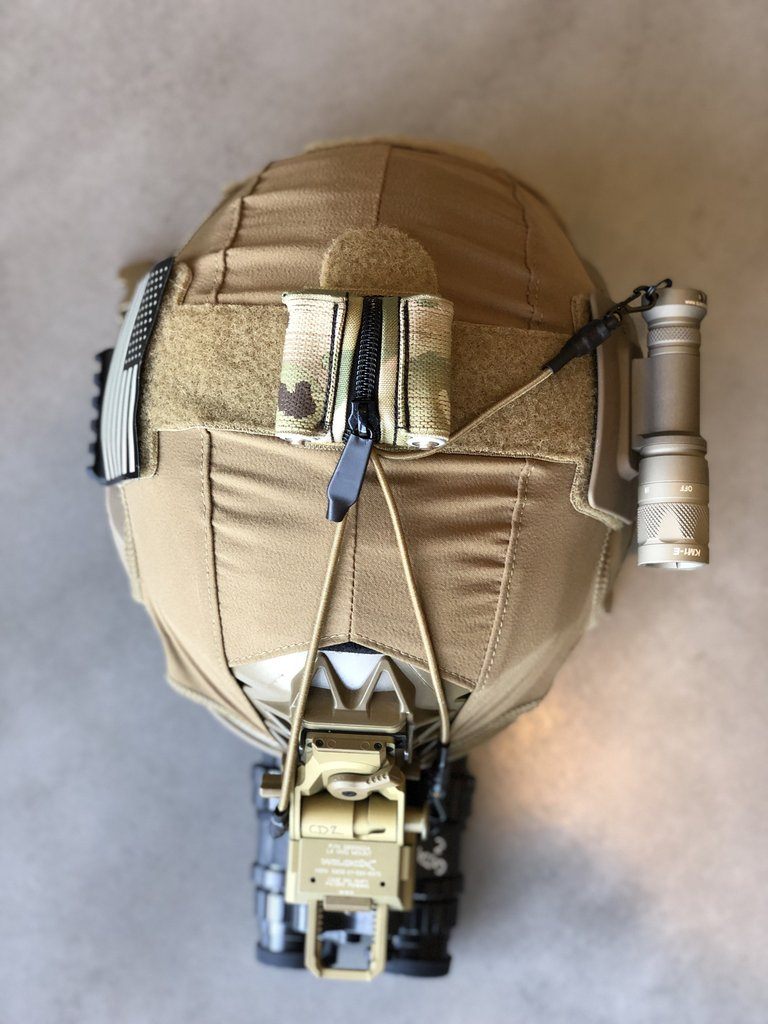
Photo by Costa Defense
The SRS is cheaper than the Wilcox lanyard at $49.95 on Costa Defense’s website. It has three cords with hooks so you can tether three separate helmet accessories if you needed to.
TREX Arms SBL NVG Lanyard
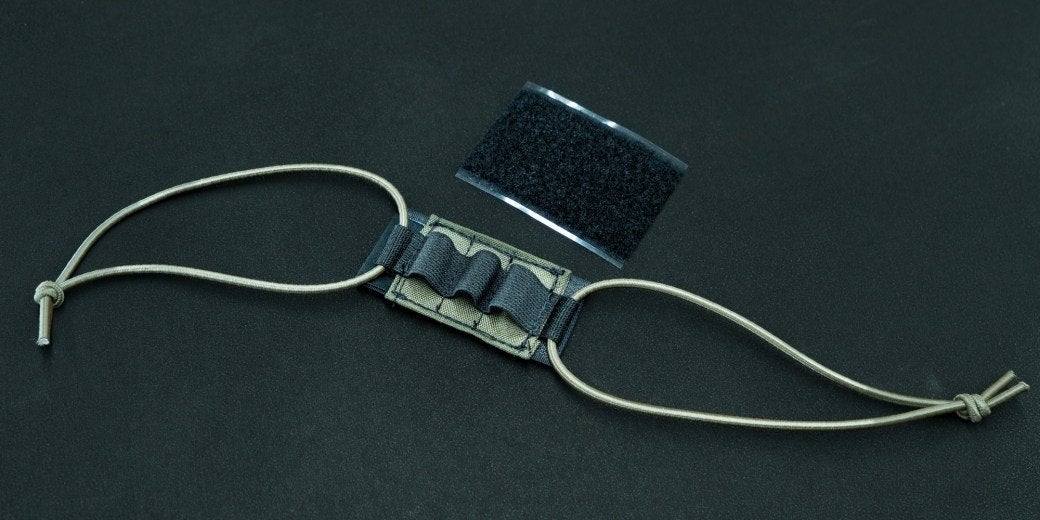
Photo by TREX Arms
Other than buying a length of shock cord and tying it to your helmet to act as a NODs lanyard the TREX Arms SBL NVG Lanyard is the next best thing. In fact, it is slightly better since tying your NODs to your helmet is a great remedial solution but it is not expedient if you need to remove your NODs from your helmet. The SBL lanyard is attached with Velcro like the Costa Defense SRS. Similar in function to the SRS the SBL has integrated elastic webbing for holding spare batteries for your NODs.

Photo by TREX Arms
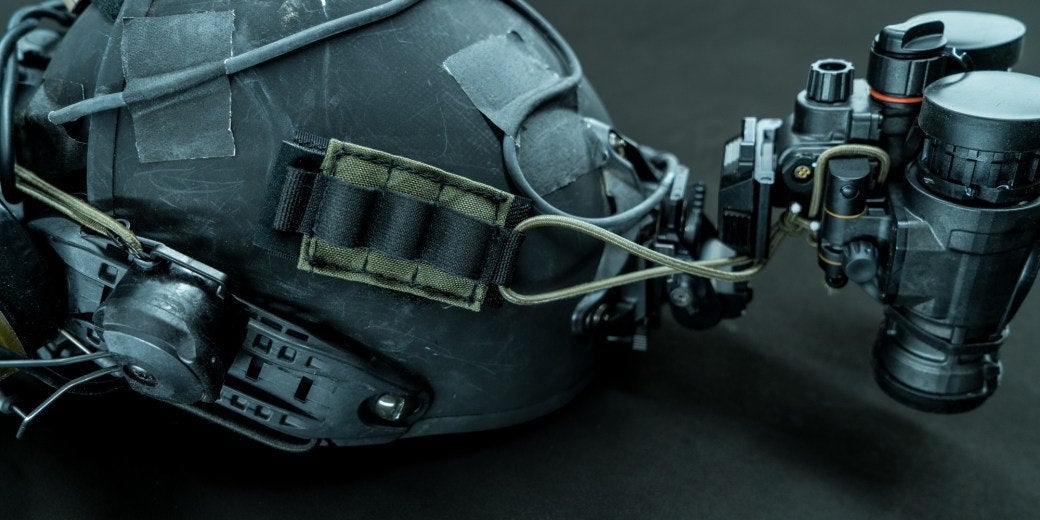
Photo by TREX Arms
The SBL uses a simple loop of shock cord that you can either tie directly to your NODs or loop it around the entire bridge for binocular goggles.

Photo by TREX Arms
The SBL has a dual purpose. You can use one to help secure your battery pack if your goggles use battery packs. The SBL is double-ended for this purpose. Stick the loop velcro panel onto the outside of your battery backpack and attach the SBL. Then loop the shock cords around your ear pro mounts.
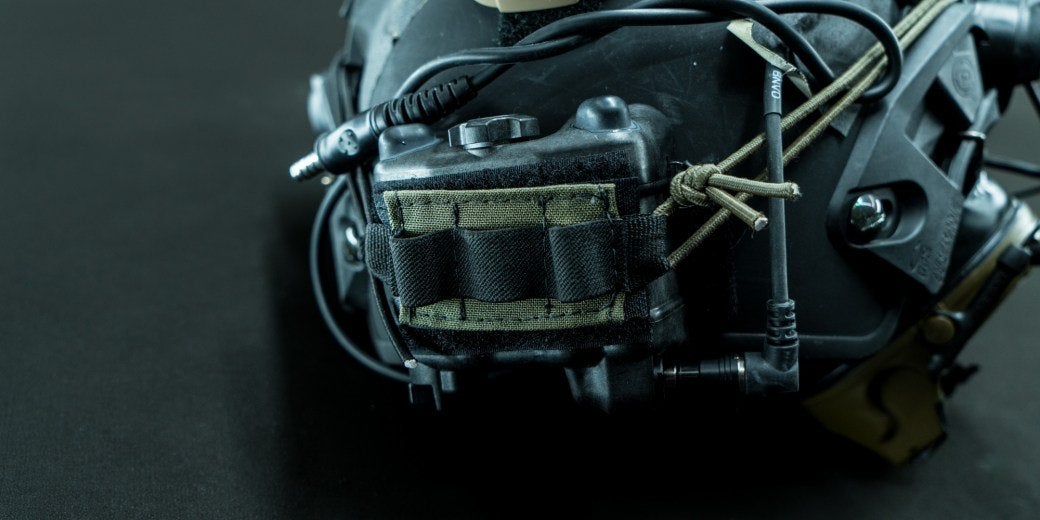

Photo by TREX Arms

Photo by TREX Arms, The SBL is being used to retain the cables from the Comtac Ear Pro.
The SBL NVG Lanyard is only $30 on TREX Arms’ website.
Helmet Mounted Ear Pro
Now that you know how to protect your NODs with a lanyard let’s focus on protecting your hearing. Not everyone can have a suppressor for their gun. So hearing protection takes the form of earmuffs. Sure you can use earplugs but there are some benefits to wearing ear muffs especially if they are electronic. However, it is not the most comfortable experience trying to wear your helmet on top of your ear pro. Mounting your ear pro to the helmet serves two roles. First, it means you always have ear pro if you got your helmet. The second function is that it helps anchor your helmet to your head. Yes, helmets have chin straps but helmets can weigh a lot once you start adding night vision helmet safety accessories and the sheer weight of the NODs themselves. Don’t forget that ballistic helmets themselves are hefty as well. Turning your head side to side with all that weight on the helmet can cause the helmet to shift a bit. But having helmet-mounted ear pro can help hold the helmet and center it on your head.
Peltor Helmet Adapter

Probably the most common helmet-mounted ear pro adapter are the Peltor adapters. However, they are only compatible with Peltor ear pro and ARC Rails for Ops-Core helmets. They are not terribly expensive at $59 on Amazon. Be wary of airsoft replica adapters. They may be good enough for airsoft and recreational use but they are not as good as the real thing. One benefit to the Peltor adapters is that they have two positions. You can pull the ear muffs out and they will lock open. While this sounds like a nice feature it can be detrimental to your hearing protection. Something could snag the ear pro and lock them open. Or in the case of breaching charges, the force of the charge can pop the ear pro out and lock them open.
Unity Tactical MARK
Photo by Unity Tactical
The Unity Tactical Modular Attached Rail Kit (MARK) ear pro adapters allow common hearing protection to be attached to your helmet, not just Peltor ear pro. They will work with Peltors if you got them but you can use the MARK adapters for MSA Sordin or Howard Leight electronic ear pro.

Photo by Unity Tactical
They are small an unobtrusive. You saw how the TREX Arms SBL lanyard made use of the MARK to secure an NVG battery backpack.
The MARK is compatible with different helmets as well. You can use them on Ops-Core, Team Wendy, Revision and MTEK rails. The MARK is a little more at $76 but their compatibility makes it worth while. They do not have a locking position so they will always have constant pressure inwards.
OPS-CORE AMP/RAC
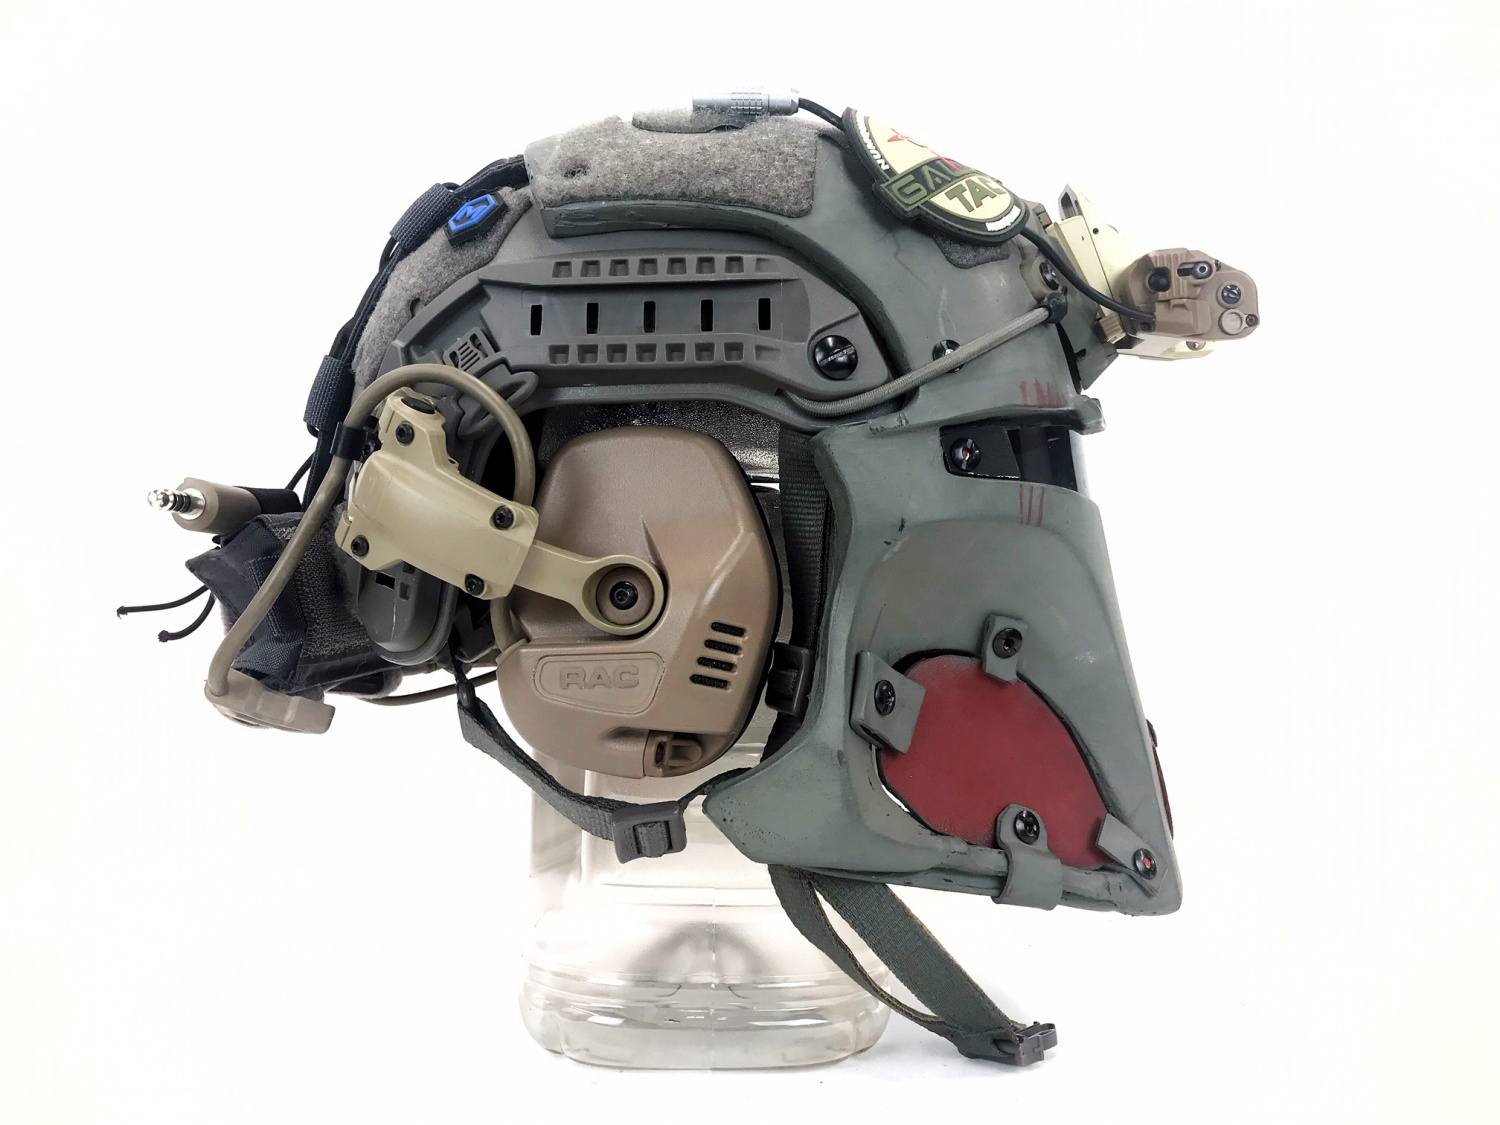
Ops-Core originally came out with their RAC series of ear pro. The Rail Attached Communications RAC are exactly what the acronym says they are. They allow you to attach ear pro to the rail of your helmet. As far as I know, they only work with ARC rails. One nice feature of the RAC helmet mount is that it utilizes the relatively unused rear vertical section of the ARC Rail compared to the MARK or Peltor adapter that hog up the horizontal section of rail. The huge downside to the RAC is that they are rather expensive. Retail for the OPS CORE RAC is $1,331 on Gentex Website.

Photo by Gentex
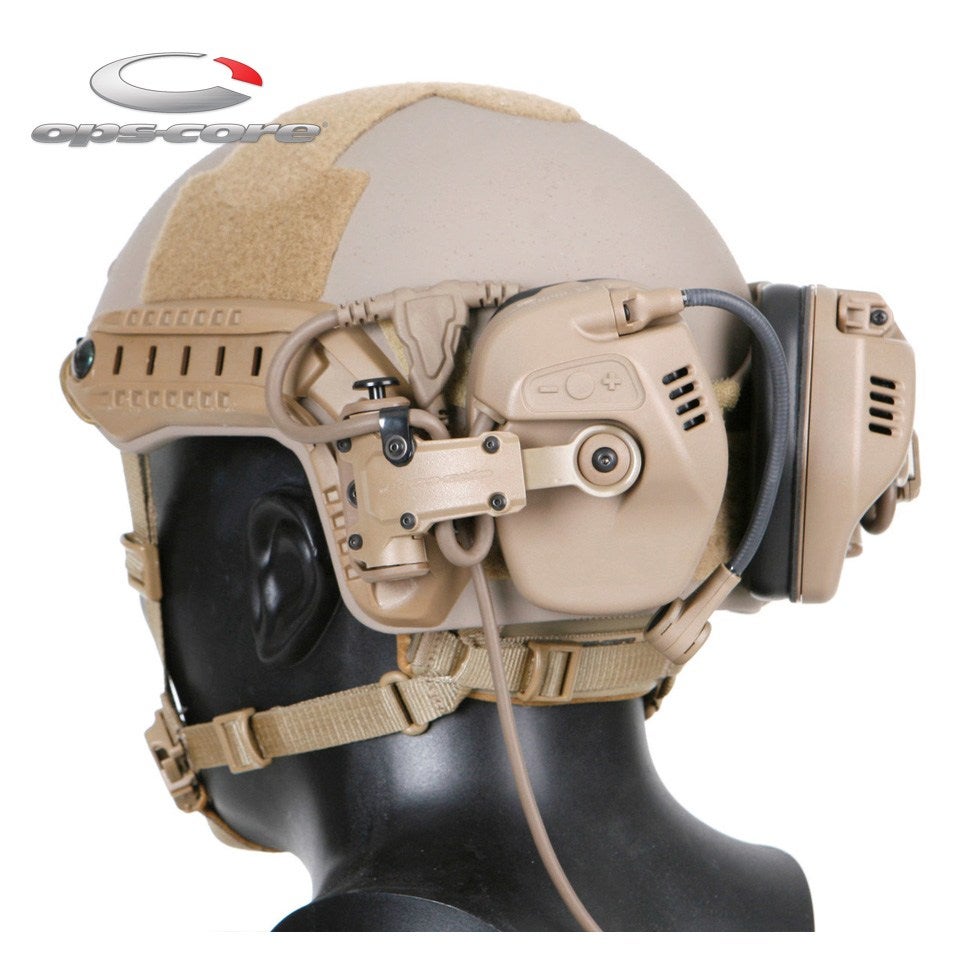
Photo by Gentex
One issue with the RAC are the helmet mounts themselves. They have stepped locking positions to open the ear muffs away from your head. But there have been issues with this system as well as the actual mount to the helmet so Ops-Core revised the design with their AMP headsets. The RAC headset is a self-contained system – all the communication cables are fixed to the headset. The AMP is modular.

Photo by Gentex. AMP headset mounted to the helmet
The helmet mount is no longer fixed to the earmuffs. And rather than stepped locking positions the AMP helmet mounts uses a more robust double spring design that locks open all the way. They only lock open at 90 degrees to the helmet. They are simply force to overcome design rather than a plunger detent system like on the RACs. But you end up looking like a tactical Mickey Mouse when they are locked open.
My friend Kythe has AMPs and when opened you get a Tactical Mickey Ears look.
As I mentioned earlier, the AMPs are modular. Since the earmuffs are no longer fixed to the helmet mounts you can quickly remove the earmuffs and wear them like a standard headset for when you do not need to use a helmet. If you want to use communications the downleads simply plug into the AMP earmuffs.

One major benefit to the RAC or AMP headsets is Gentex’s NMFI earplugs. The Near Field Magnetic Induction (NFMI) earplugs do not use batteries but rather their close proximity to the AMP ear muffs allow for sound to be wirelessly transmitted into the earplugs. This allows you to double up your hearing protection without sacrificing the audio quality of AMPs. Or if you are running hot you can open the earmuffs, store them up on your helmet and still have hearing protection with electronic hearing. But what is the price for all this technology? The AMP headsets start at $1,000. The helmet mount adapters are another $100. The NMFI earplugs? Those are $200. So you are spending the same amount of money as the RAC but now you can configure your ear pro however you want. If you have Ops-Core RAC headsets, you can upgrade the helmet mounts to the AMPs. Just unscrew the clamp for the AMP earmuffs and directly bolt the new arms to your RAC earmuffs.
Night Vision Helmet Safety Accessories: Illumination
When running and gunning in the dark with night vision it is a good idea to have a safety beacon or strobe to signal to other shooters you location this helps avoid accidents.
There are a lot of different strobes and you can get IR producing strobes so only your night vision equipped friends can see you or you can go VIS strobe so people who are not using night vision at night can still see you. Here are two interesting options
Hel-star 6

Photo by Core Survival

Photo by Spiritus Systems
Hel-Star 6 is a popular option. It is the size of a gaming PC mouse. It has both VIS and IR modes as well as a number of different color LED options in various models. One feature that sets the Hel-Star apart from other IFF strobes is the Hel-Star F2. The F2 version of the Hel-Star 6 has a sensor that can detect if you are being interrogated/painted by an IR laser. Once the F2 detects an IR laser pointed at it, it has a vibrating pigtail that runs into or under your helmet to quietly alert you that you have been targeted.
Steiner MCID

The Steiner MCID is a tri-band helmet beacon. Most beacons are either visible or VIS/IR capable. However, the MCID adds another layer and can be made to display MWIR or SWIR. MWIR or Mid-Wave IR is actually the wavelength for thermal vision. SWIR is Short Wave IR and that is out of the band for your standard night vision devices. You need a SWIR enabled night vision device to see SWIR.


MCID at the Steiner booth during SHOT 2019
This Is Just The Beginning Of Night Vision Helmet Accessories
This article is getting long so I will stop here. There are plenty of other accessories that I have not mentioned here. This is merely scratching the surface of what is out there for night vision helmet accessories let alone safety-oriented ones. I will follow up this article with continuing articles in the future and cover the accessories I have not mentioned here. I hope you may have discovered something new to you here in this article and found it useful.
We are committed to finding, researching, and recommending the best products. We earn commissions from purchases you make using the retail links in our product reviews. Learn more about how this works.